Cisco SD-WAN - PART III - Static NAT
In this article, I want to discuss the SD-WAN "STATIC NAT" feature.
A vEdge cloud router can play a NAT role. It can do the natting both on the transport side ( VPN 0 ) and on the service side ( VPN 1, for example).
If we deploy NAT in the transport side, NAT functionality allows traffic from the localhost to move directly to the Internet. Also, we can do port forwarding, and finally, we can have static nat to publish our DMZ server to the Internet.
In this scenario, we will practice "STATIC NAT " on the transport side.
Note: in some documents, this feature called "one to one" nat.
To achieve this goal, according to our topology, we need two essential steps:
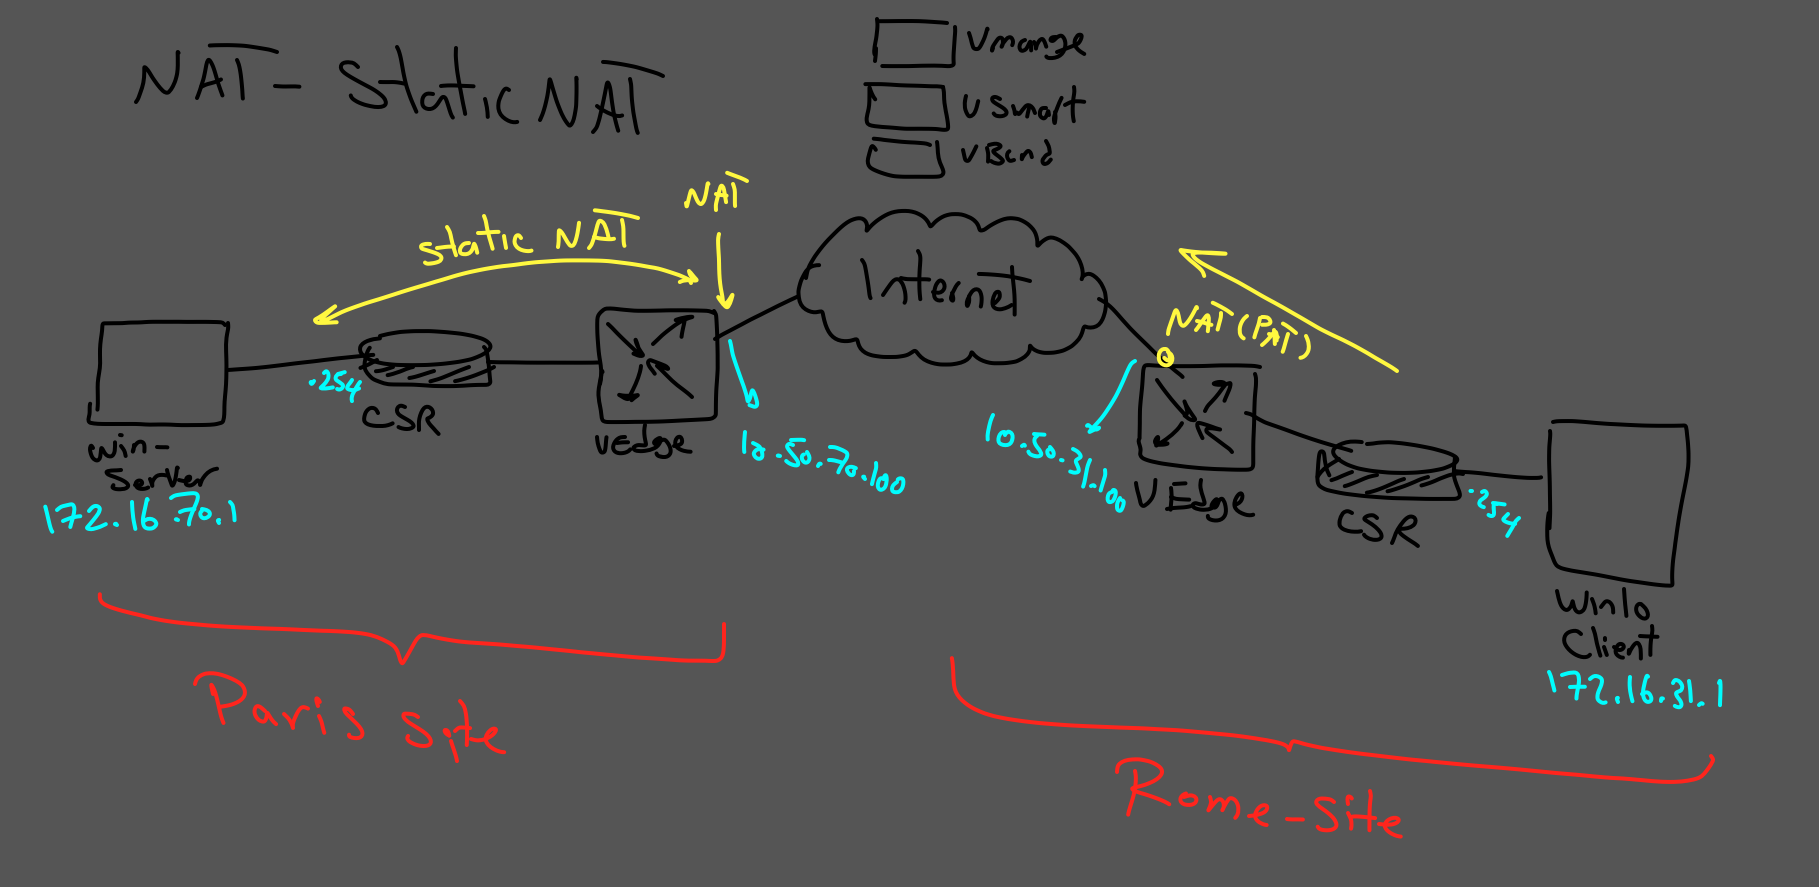
- On the Rome site, we need to have PAT for clients to reach the Internet.
- On the Paris site, we need to have "STATIC NAT" for publishing our web server in DMZ to the public.
PART I - ROME SITE:
To achieve PAT in the Rome site, we need to configure PAT in vEdge Transport VPN, to understand the procedure you can follow this link:
https://www.networkingwithehsan.com/sd-wan-nat-part1
PART II - PARIS SITE:
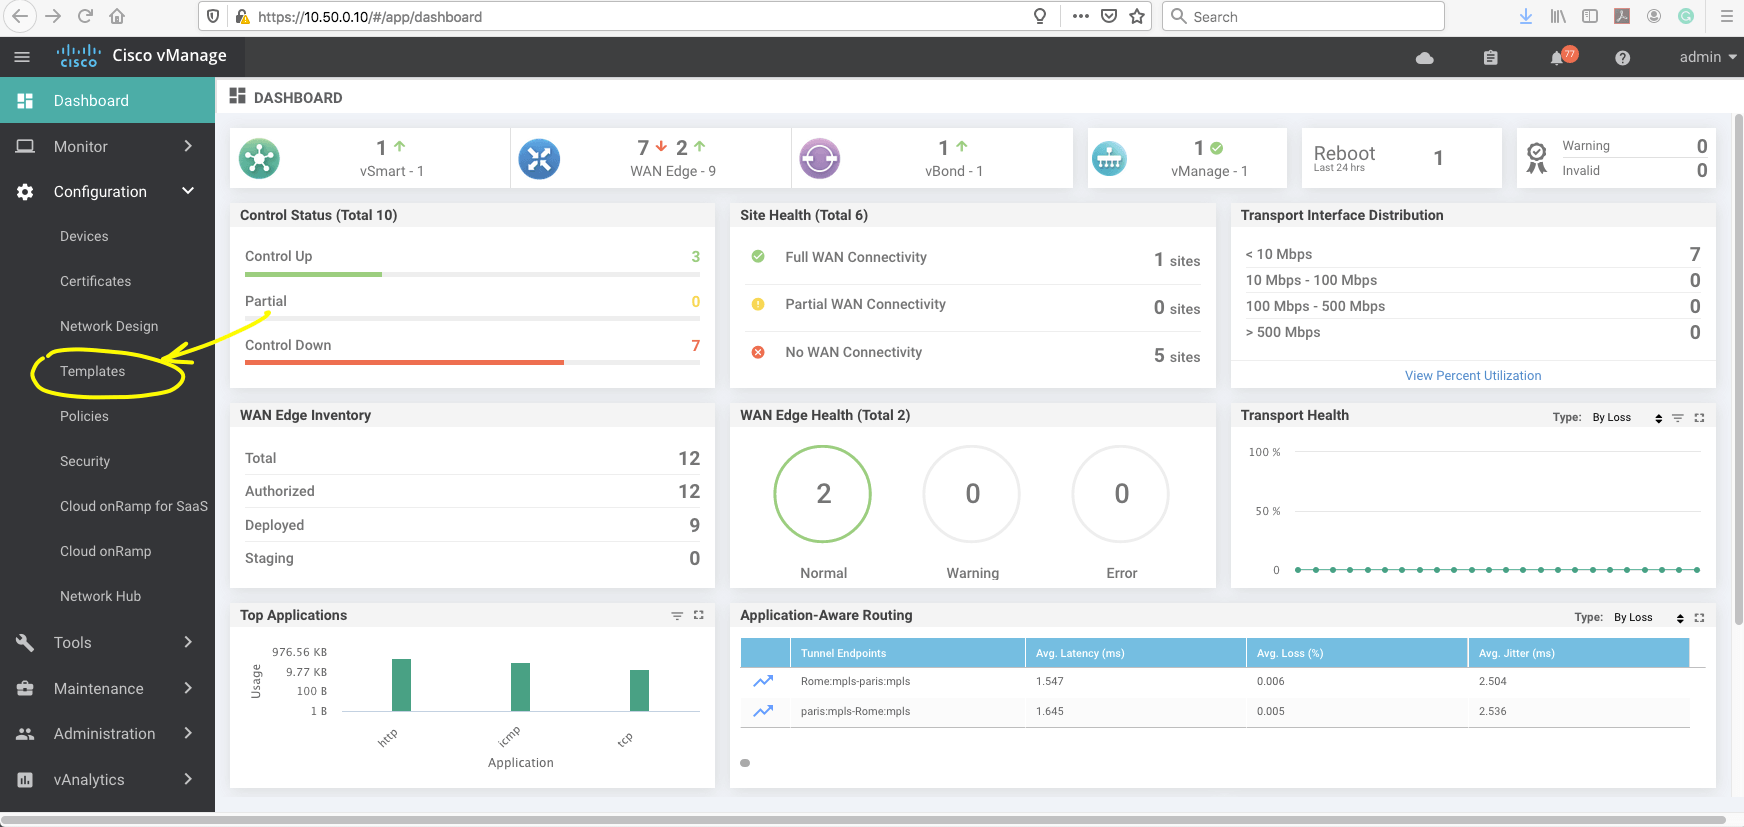
In my scenario, I am using vManage to do the configuration for Paris Site.
Step number one is to enable nat on the vedge router. (Transport VPN)
For this purpose, go to the "templates" menu and choose the Paris vedge profile.
Then we have to select Interface under VPN 0 ( Transport VPN).
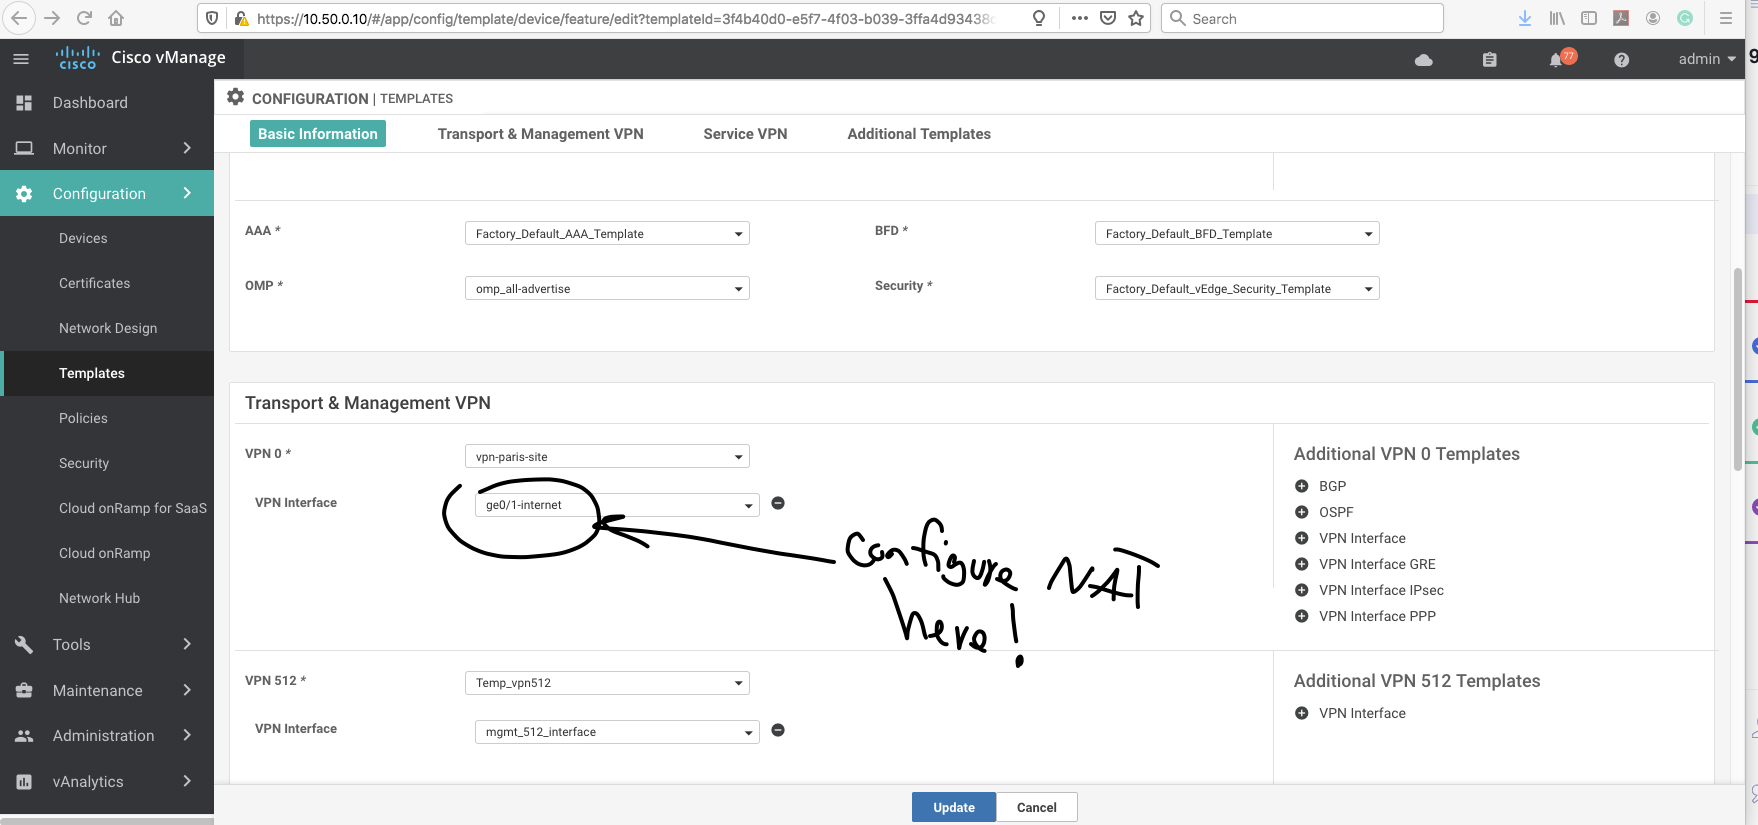
And enable the NAT in the profile.
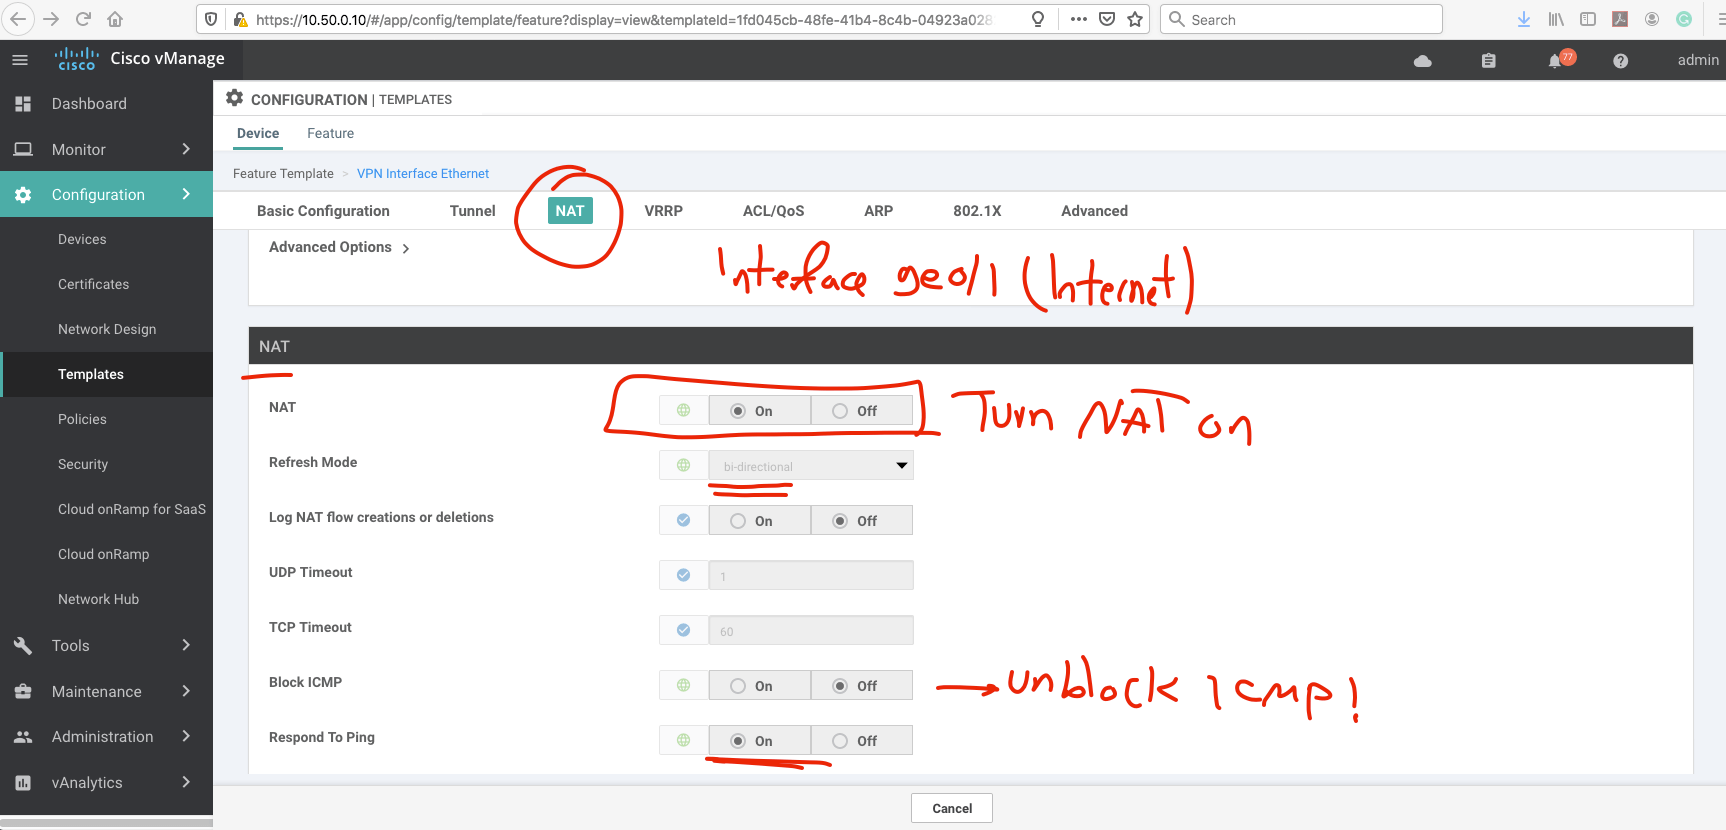
Now, we have to create "NAT POOL RANGE."
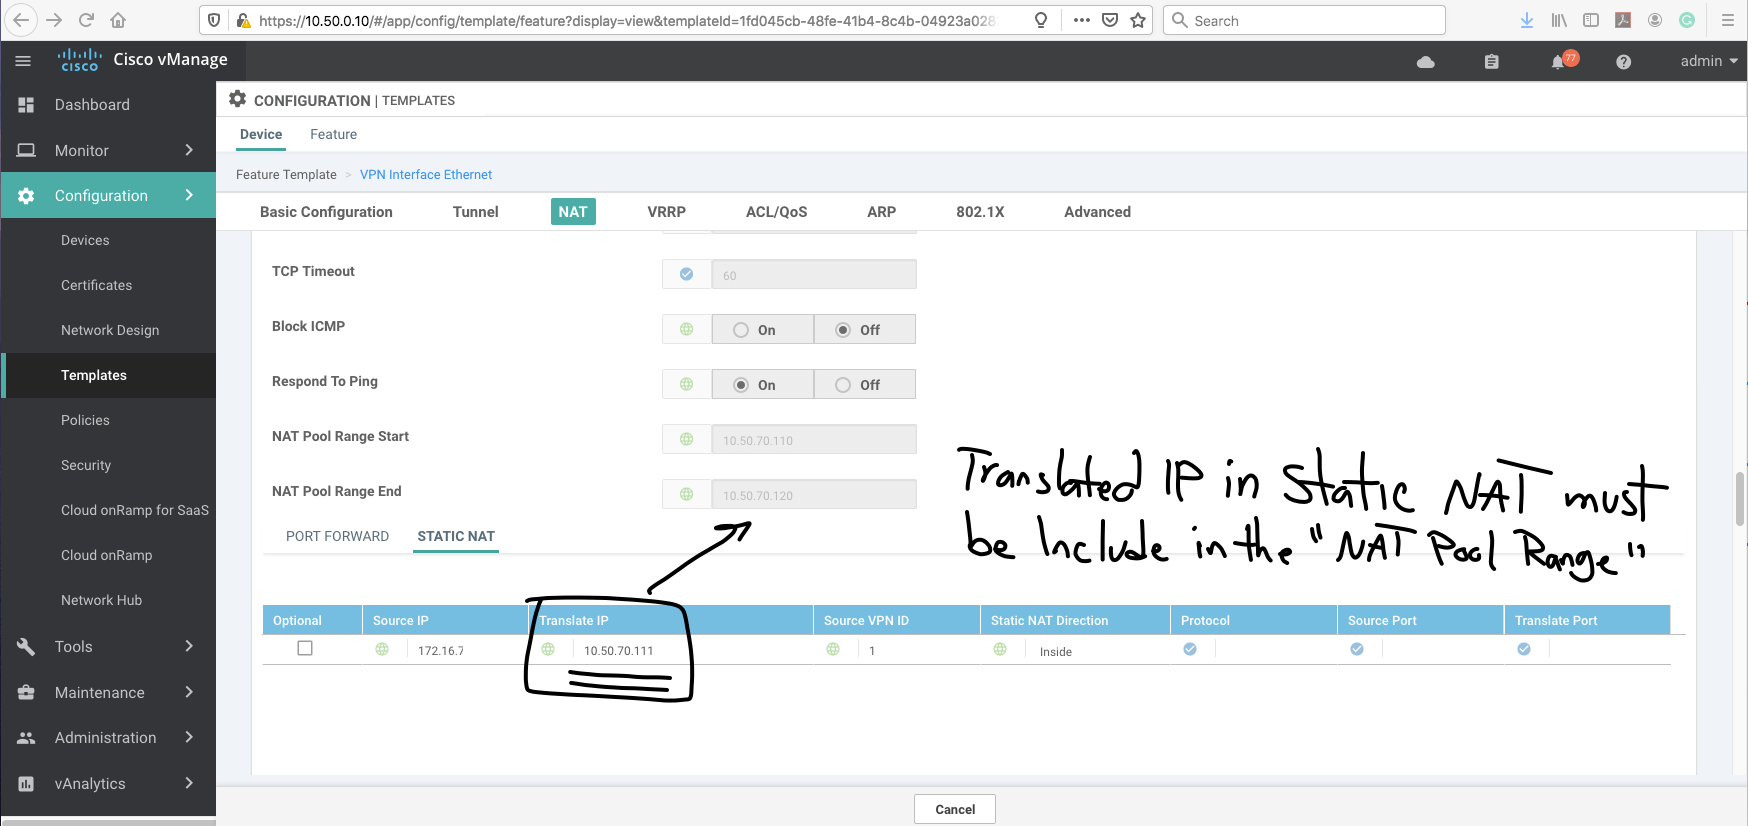
After configuring the nat pool range, we need to choose "STATIC NAT" option and add static nat:
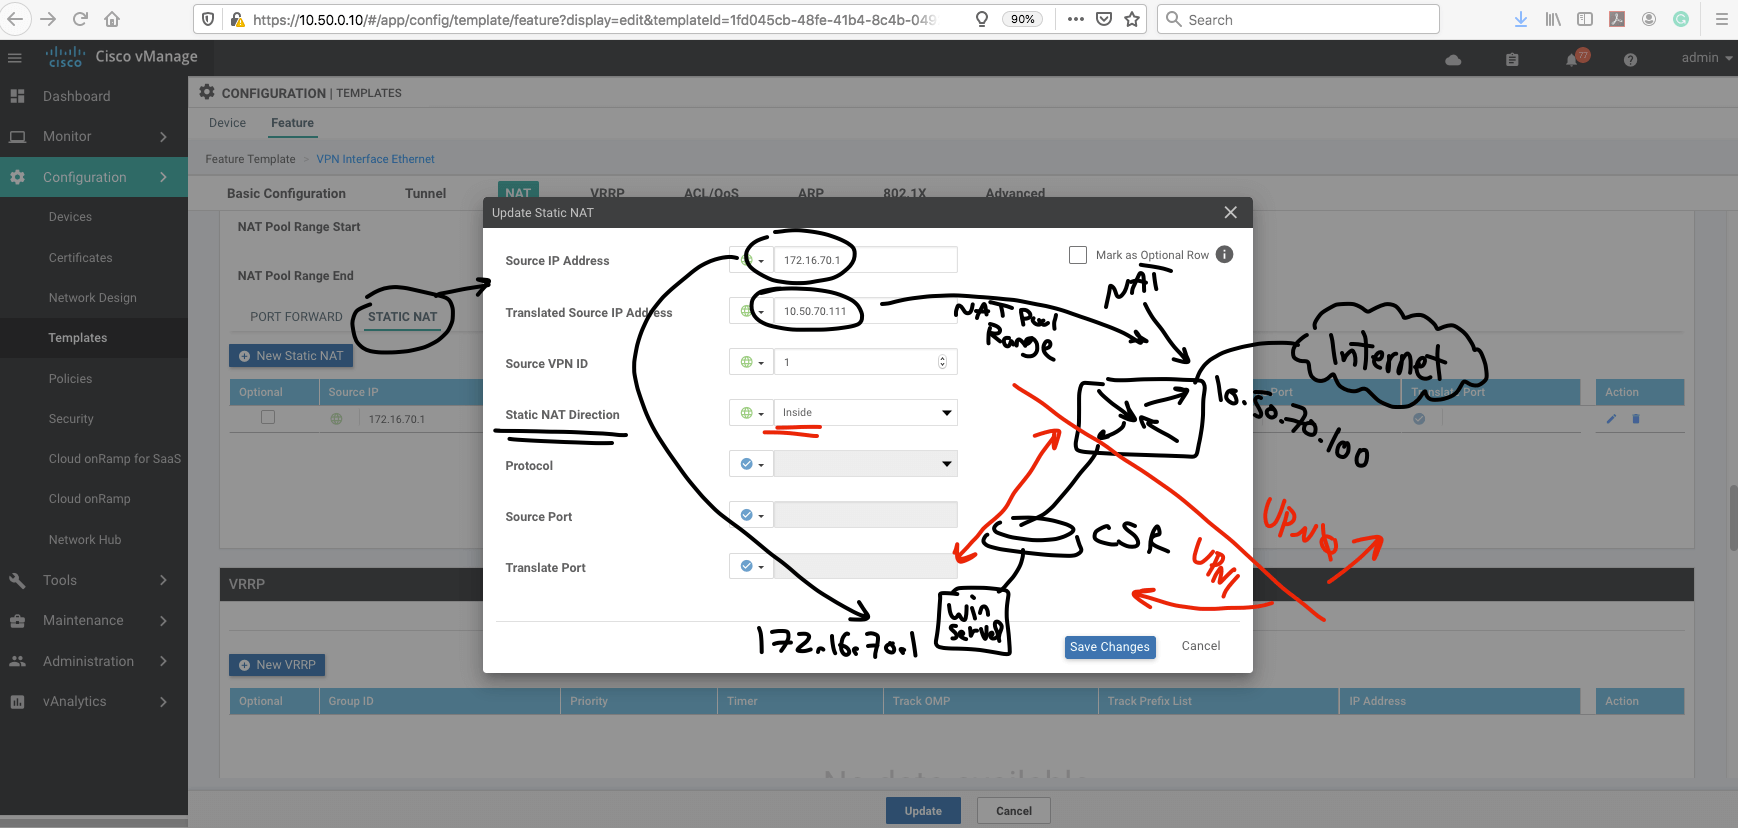
That was the STATIC NAT config.
Let's make the final move.
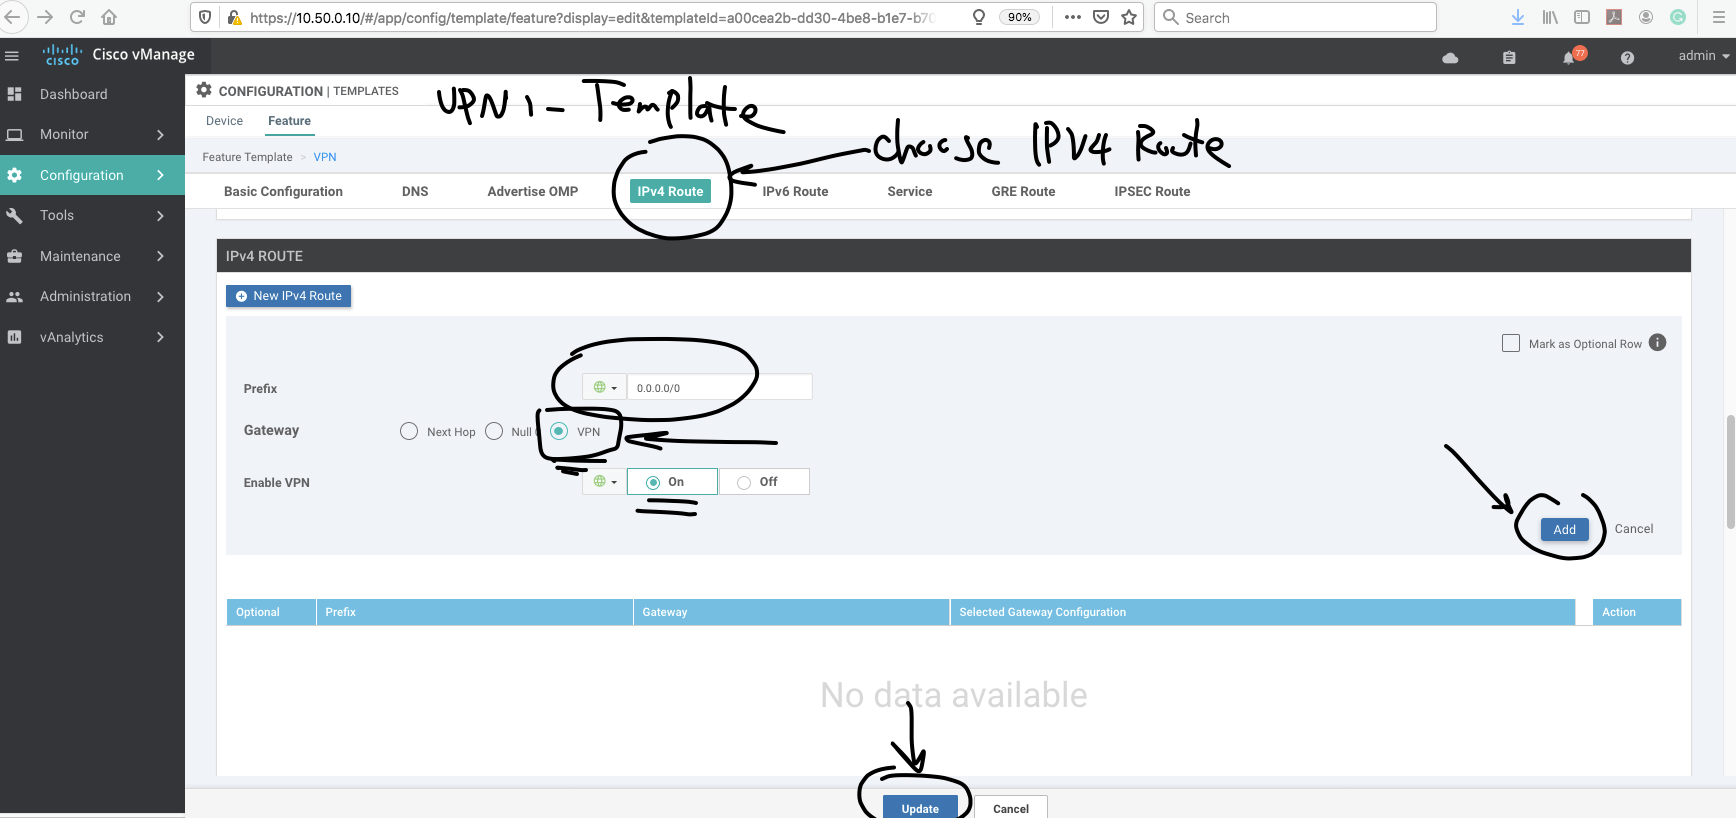
In this action, we have to add a route in the service side (VPN 1 ) to VPN 0.
Here is the procedure:
First, we go to VPN 1(in our scenario service VPN is VPN 1) template.
and add a default route to VPN 0
Note- remember to choose interested traffic for NAT.
Verification part:
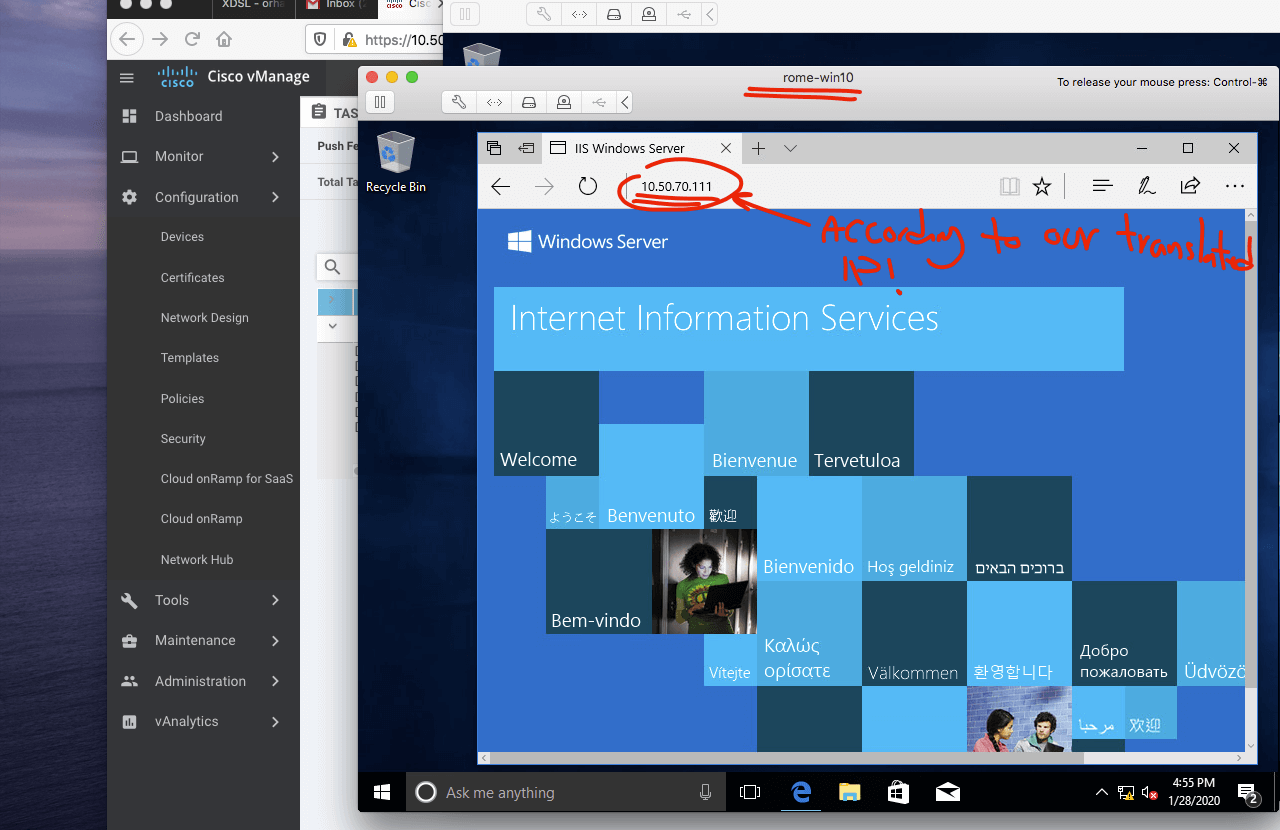
Now we try to establish an HTTP connection from Rome client to Paris web server.
In the Paris site, the public IP is 10.50.70.111( transleted IP for web server).
And I create static NAT to "172.16.70.10", which is the Paris web server actual IP address.
To understand more, I do the verification from vmanage.
Let's check out:

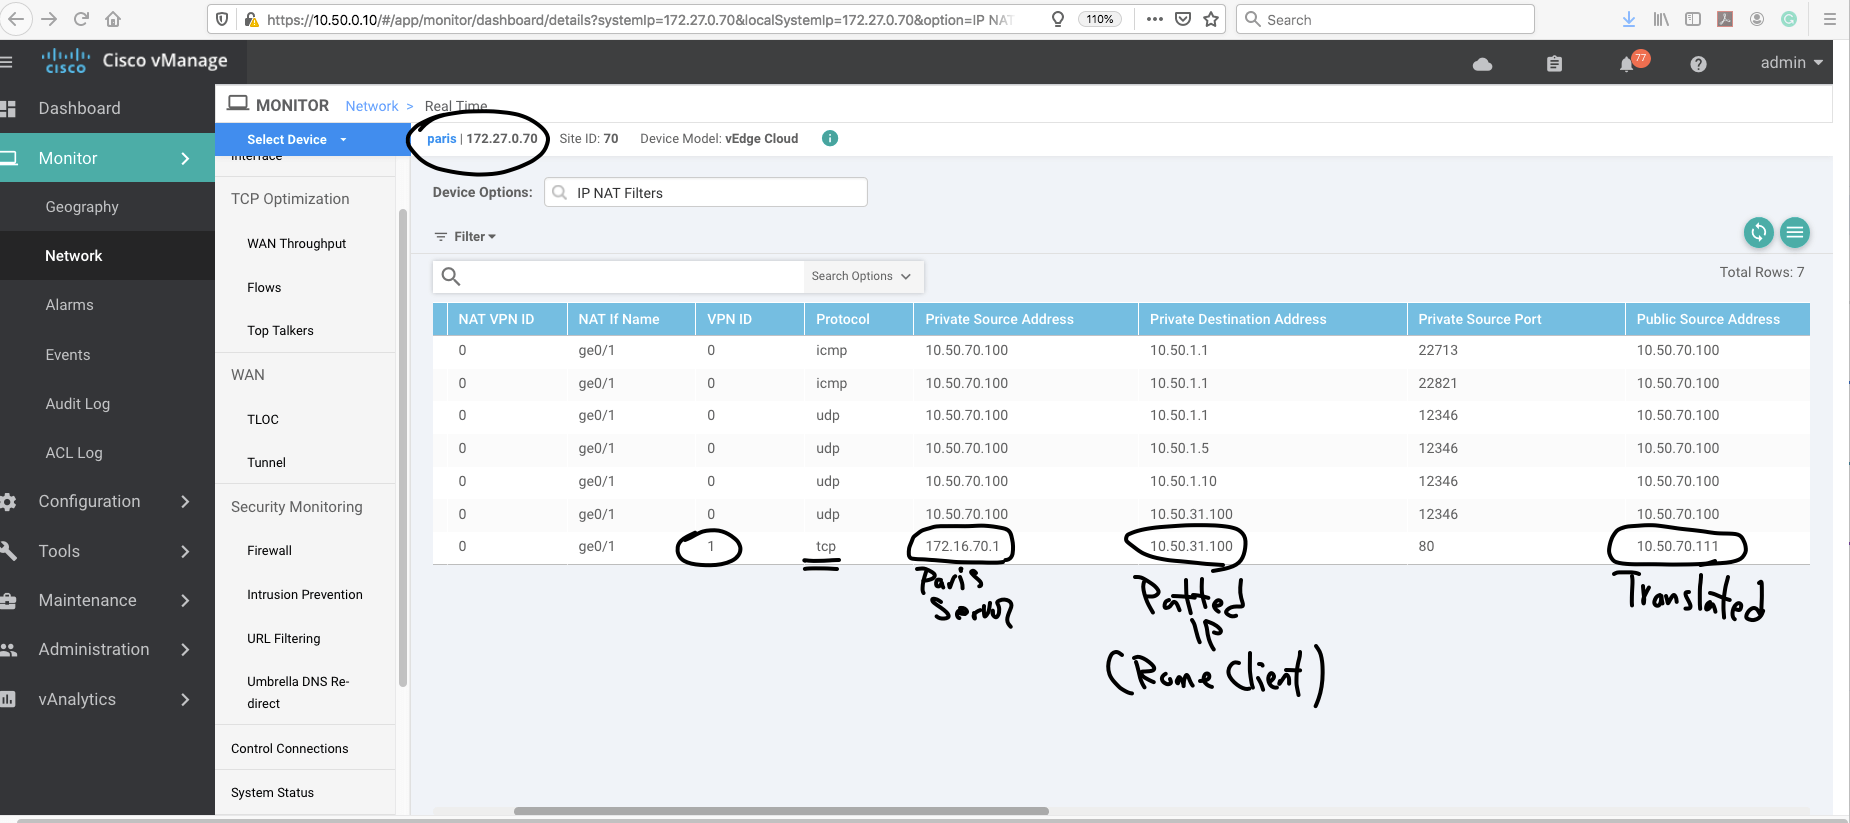
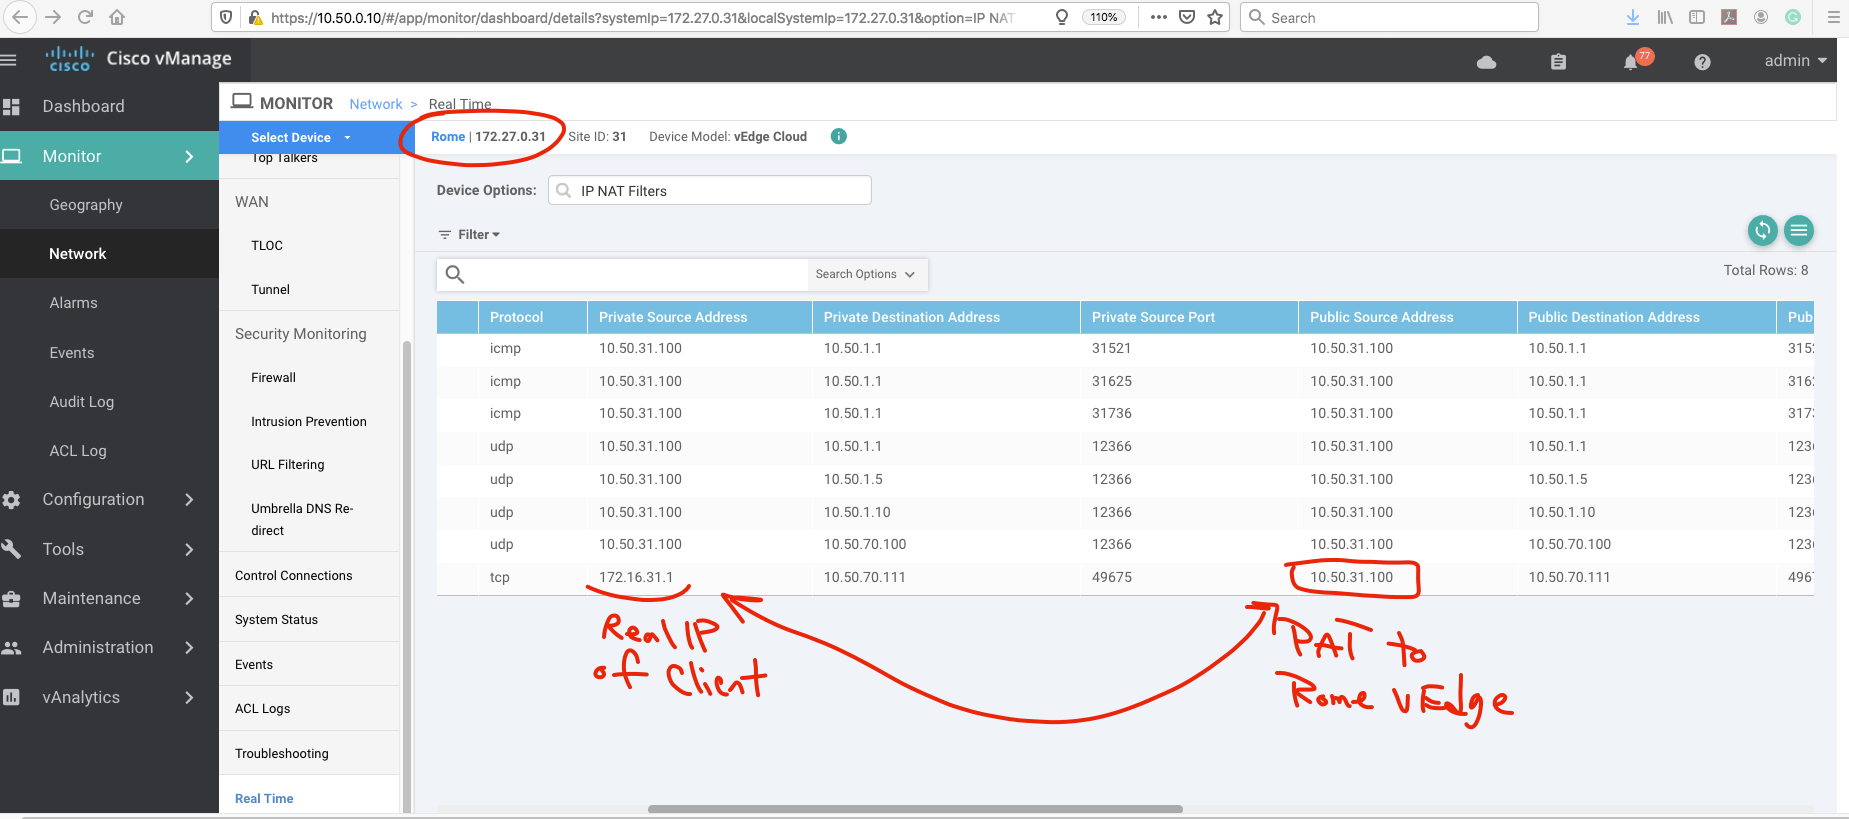
So as you can see the client in Rome is patted to Rome vEdge Public address and try to reach Paris translated IP address (Public Address of web server).
The Paris vEdge do the STATIC NAT and web server in DMZ is reachable for Rome Client.
Thank you for viewing.